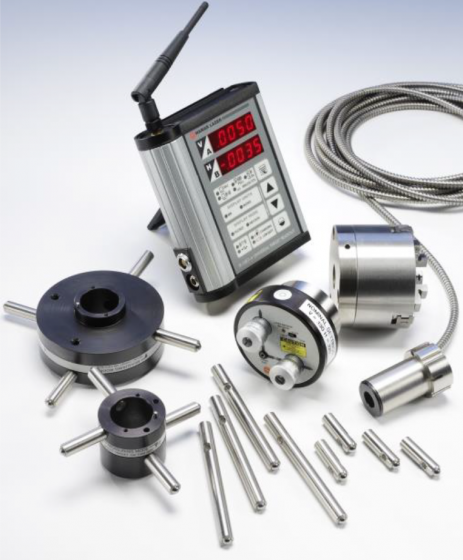
System Highlights
- Fast: 15-minute setup time. Measure each bore in seconds!
- Easy: Unique self-centering adapters are easy to insert into tight spaces and do not need to be inverted (0° & 180°) to calculate results.
- Versatile: Many target and adapter options for bore diameters from .250 in. (10 mm) to 40 in. (1 m) or more.
- Simple: Use simple X-Y readouts with .00001 in. (0.001 mm) resolution to view the data. No “black boxes” needed!
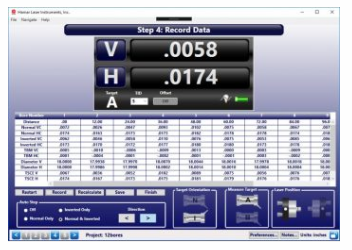
- Bore9 Software: Record bore alignment, calculate straightness results and print reports using optional Windows-based Bore9 Software.
Key Features
- 5-minute setup time. Measure each bore in seconds.
- L-705 Operational Range: 1 to 100 ft (0.2 to 30.5 m).
- Angular adjustment resolution of .0025 in. in 100 ft (0.025 mm in 30 m).
- A-510STA and A-510LTA Self-Centering Bore Adapters are easy to insert into tight spaces and do not need to be inverted (0° & 180°) to calculate results.
- Customized adapter measuring legs fit a large range of bore diameters from 2.25 to 16 in. (57.2 to 406.4 mm).
- R-1307 Readouts with .0001 in. (0.001 mm) resolution update in real time as the bore is adjusted.
- Add a second readout to transmit readings wirelessly up to 200 ft (61 m).
- Optional Bore9 Software aids with setup, records bore alignment data, analyzes the results and prints reports.
- Optional small-bore targets can align bores as small as .250 in. (10mm).
- Optional spherical-bore target with Virtual-PSD™ technology comes with customized adapters for easy and fast alignments.
- Durable and rugged, designed to last many, many years of service.
Applications
Aerospace
- Hinge-Line Spherical Bearing Bores
Manufacturing & Metalworking
- Boring Bar Bearing Alignment
- Heat Exchanger Tube Sheet and Tube Support Plate Alignment
Military
- Artillery Gun Barrel Straightness Checks
Plastics
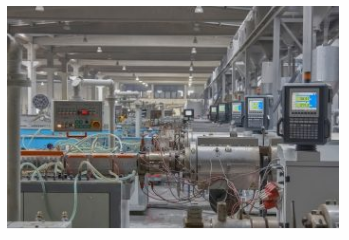
- Extruder Barrel Alignment
- Extruder Bore Straightness and Wear
Power Generation
- Gas Turbines
- Steam Turbines
Highest Bore Alignment Accuracy in Industry
Hamar’s bore alignment systems are the most accurate in the industry. Our patented, self-centering targets combined with ultra-precise lasers means accuracies down to .0003 in. (0.0075 mm) in 10 feet (1 m) are no problem for our line of bore alignment lasers.
Patented, Self-Centering Target Bore Adapters
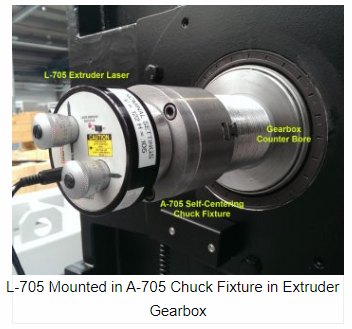
Hamar Laser has developed the world’s first self-centering targets (A-510, A-512, T-220, T-221, T-1240) and bore adapters (A-510STA/A-510LTA, A-512STA/A-512LTA, A-514A/B/C, T-221STA) that use no moving parts to self center in a bore. It takes just seconds to position the target in the barrel for an accurate measurement down to .0005 in. (0.01 mm). This eliminates the annoying 0 and 180 measurements needed for typical bore targets.
Widest Range of Bore Diameters in Industry
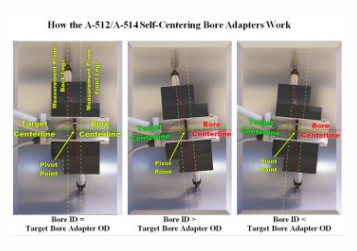
We’ve been making bore alignment systems for 30 years and have the widest array of targets to check bore alignments with diameters from 1.2 in. (30 mm) to 40 in. (1 m). Most of our targets are self-centering and highly accurate with accuracy down to .0002 in. (0.005 mm) in 10 ft. (3 m).
Simple Fixturing for Fast Setup
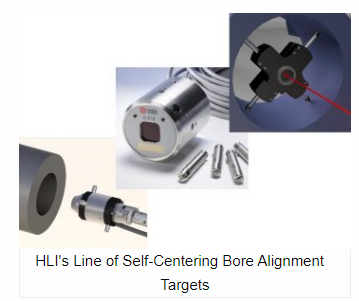
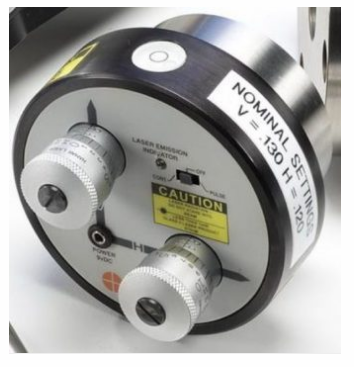
The L-705 Laser has been designed with a .750 in. (19 mm) mounting stud and flat face with magnets to hold it flush to fixturing. Since the laser beam is concentric to the OD to within .0005 in. (0.01 mm), a simple flat face and .750 in. (19 mm) hole on center is all that is needed to hold the laser (the extruder package includes a self-centering chuck fixture). In fact, the laser replaces the first reference target that a typical borescope would need.
Wide Angular Adjustment Range
The L-705 Laser has an angular adjustment range of L-705: ±0.18° (± .0375 in./ft or ± 3.13 mm/m) and is used on applications under 40 feet (12 m), such as extruder barrels and hinge-line bore alignments.
Diameter-Change Measurements
TheA-510STA/A-512STA (or LTA) Bore Adapters can be placed on the A-510 Target in two ways:
- Self-Centering Mode, where it will center itself into the barrel.
- Measuring Mode, where the adapter will measure diameter changes in the bore.
To measure diameter changes, a measurement is taken with an inside micrometer of a reference bore. The target and adapter in Measuring Mode are inserted into the reference bore. A measurement is taken with the target in the NORMal position and in the INverted position. The 2 readings are averaged and the result is the starting measurement for the laser. Then at each measuring location, 2 sets of readings, NORMal and INverted, are taken and averaged. Subtract the result from the reference measurement and the diameter change is produced. Get Bore9 Software and it will record the data and do the math for you!
Downloads
- L-705 Laser Borescope for Extruders – Rev A – 17×11
- L-706 Engine Block Crankshaft Bore Brochure – Rev B
- L-111 & L-102 Datasheet – Rev C
- R-1307B Basic Readout Datasheet -with KS – Rev E
- R-358 A-910 A-910ZB Computer Interfaces- Rev H
- T-1218 Datasheet – Rev F
- T-1220 Datasheet – Rev D
- T-218 & T-218T Datasheet – Rev E
- T-219 Datasheet – Rev B
- T-271 Datasheet – Rev B
- S-1403 Bore9 Software – Rev B
